How To Installed Fonts In Cricut with 5 Easy Steps!
Have you ever wanted to upload your downloaded fonts to Cricut Design Space? Sure, Cricut Design Space has a ton of free Cricut fonts, but sometimes you just want to use one of your own fonts.
The good news? Uploading fonts to Cricut Design Space is a lot simpler than you may think. Hooray for a quick win! Keep reading to learn how.
Install your downloaded font in your Windows or Mac
After you installed your font make sure to completely close Cricut Design Space and start it again. If you don’t do this it might be that the new font doesn’t load properly.
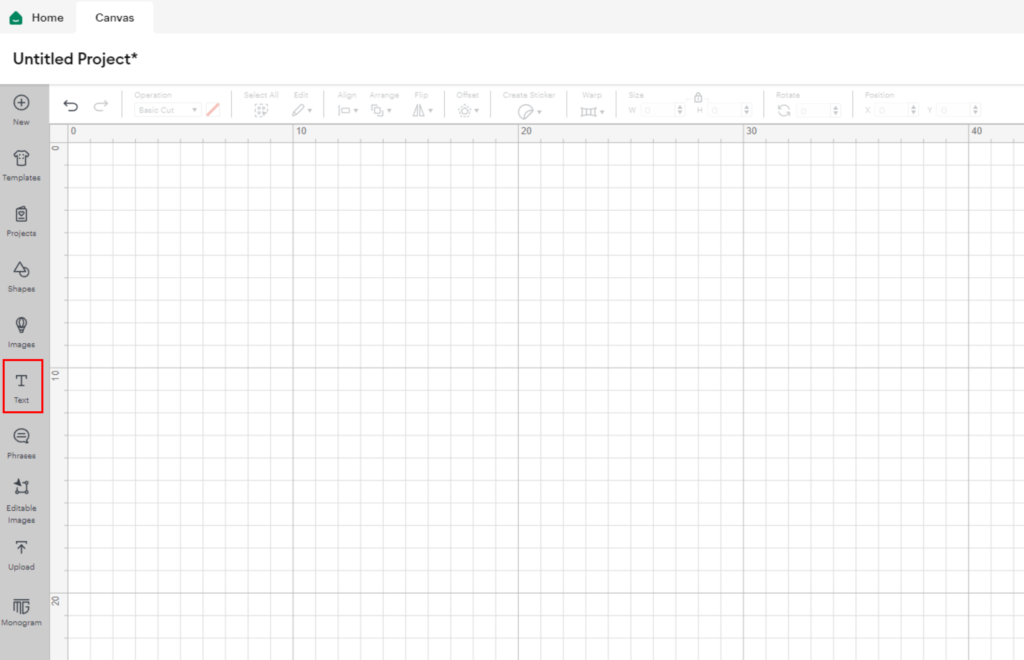
1. Open Cricut Design Space and create New Project
2. Click the “Add Text” button to start adding your text
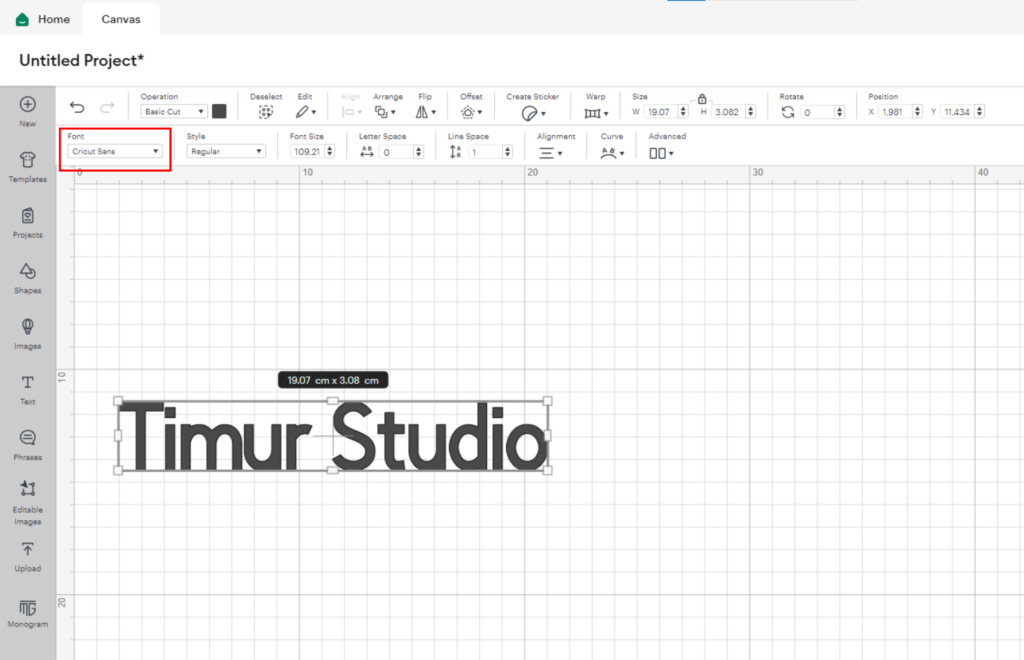
3. Write your text, make sure the text is selected and click on the “Font” dropdown
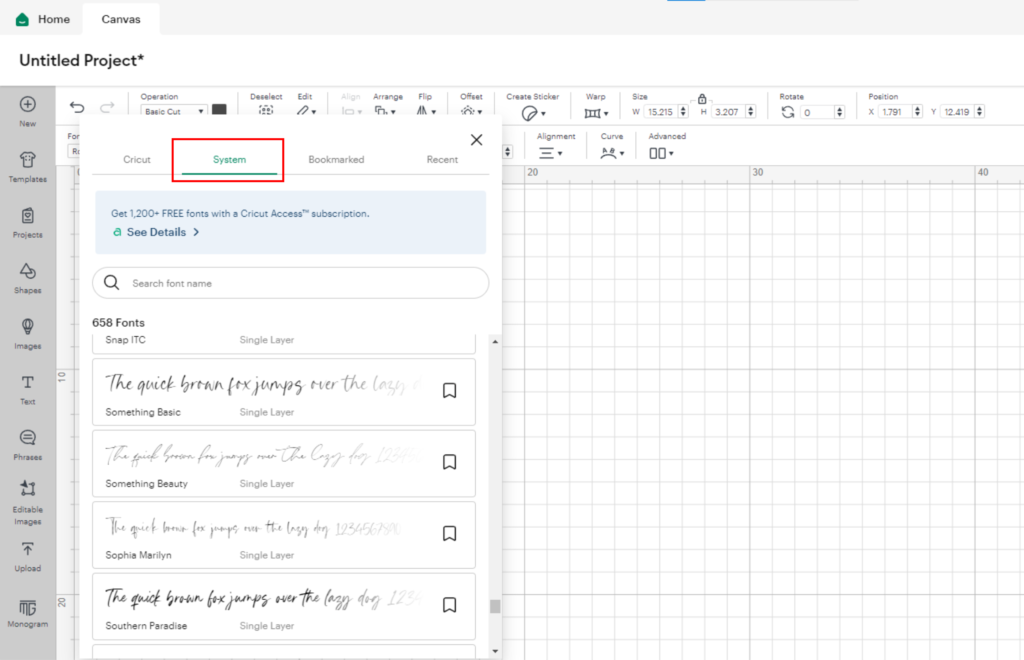
4. Select “System” on task bar
By default, “All Fonts” is selected. On the task bar select “System Fonts”. It will load your installed fonts on your computer which might take a couple of seconds.
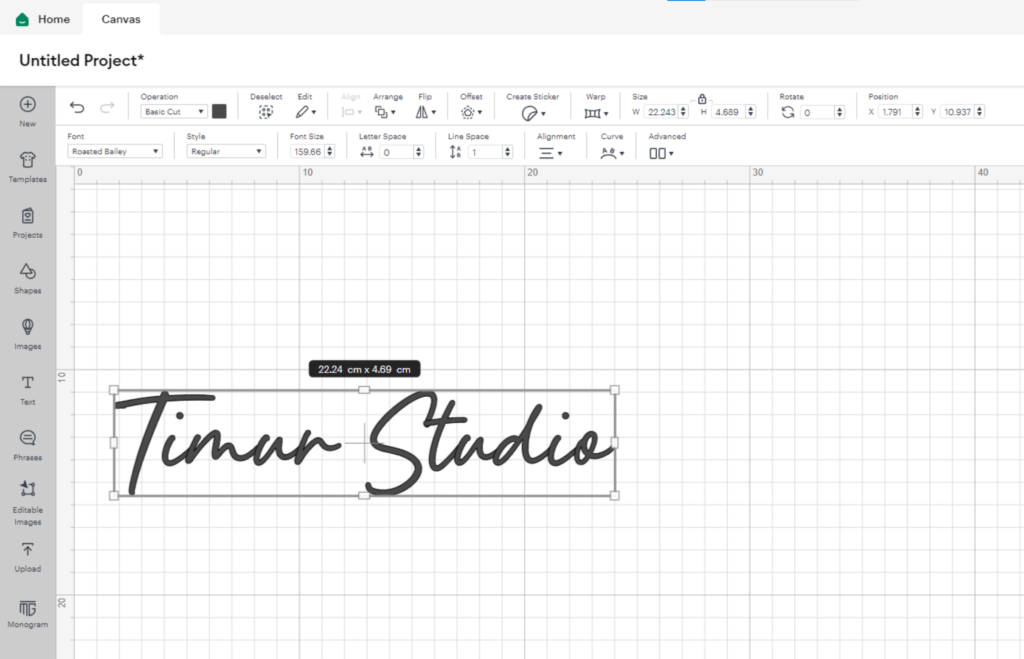
5. Now the text will be displayed in your chosen font!
Select the font you want to use, in this we’ve chosen Roasted Bailey Font.
It’s simple as that! Now you can just use it like any other font and change settings such as size and letter spacing.